カテゴリー: 未分類

  • CloudLinuxインストール

    AlmaLinuxインストール

    VirtualBox設定

    ISOファイルからインストールを行う

    「EFIを有効化」にチェックを入れる

    Expert設定にて、「セキュアブートを有効化」にチェックを入れる

    ネットワークアダプターをブリッジアダプターに変更する(任意)

    AlmaLinuxインストール

    VirtualBoxを起動して、AlmaLinuxインストーラーを起動する。

    インストールタイプとして、「Minimal Install」を選択する。

    IPアドレスを設定する

    ホスト名を設定する

    インストール前確認

    インストール実行

    インストール後調整

    面倒なのでsudo時にNOPASSWDにする。(任意)

    [root@cloudlinux ~]# cp /etc/sudoers /etc/sudoers.orig
    [root@cloudlinux ~]# vi /etc/sudoers
    [root@cloudlinux ~]# diff /etc/sudoers.orig /etc/sudoers
    107c107
    < %wheel        ALL=(ALL)       ALL
    ---
    > # %wheel      ALL=(ALL)       ALL
    110c110
    < # %wheel      ALL=(ALL)       NOPASSWD: ALL
    ---
    > %wheel        ALL=(ALL)       NOPASSWD: ALL

    最新化

    [root@cloudlinux ~]# dnf update -y
    [root@cloudlinux ~]# reboot

    CyberPanelインストール

    CyberPanelインストール

    [root@cloudlinux ~]# sh <(curl https://cyberpanel.net/install.sh || wget -O - https://cyberpanel.net/install.sh)
      % Total    % Received % Xferd  Average Speed   Time    Time     Time  Current
                                     Dload  Upload   Total   Spent    Left  Speed
    100  2572  100  2572    0     0   2932      0 --:--:-- --:--:-- --:--:--  2929
    
    Detecting AlmaLinux 9...
    
    
    Initializing...
    
    Fetching latest data from CyberPanel server...
    
    This may take few seconds...
    
    Branch name fetched...v2.3.9
    
    Checking root privileges...
    
    You are runing as root...
    
    Valid IP detected...
    
    Checking server location...
    
    Desktop OS not detected. Proceeding
    
    System: AlmaLinux 9 detected...
    
    Checking virtualization type...
    
    Initialized...
    
                    CyberPanel Installer v2.3.9
    
    1. Install CyberPanel.
    
    2. Exit.
    
    
      Please enter the number[1-2]: 1
    
                    CyberPanel Installer v2.3.9
    
    RAM check : 451/9669MB (4.66%)
    
    Disk check : 1/17GB (11%) (Minimal 10GB free space)
    
    1. Install CyberPanel with OpenLiteSpeed.
    
    2. Install Cyberpanel with LiteSpeed Enterprise.
    
    3. Exit.
    
    
      Please enter the number[1-3]: 1
    
    
    Install Full service for CyberPanel? This will include PowerDNS, Postfix and Pure-FTPd.
    
    Full installation [Y/n]: Y
    
    Full installation selected...
    
    Do you want to setup Remote MySQL? (This will skip installation of local MySQL)
    
    (Default = No) Remote MySQL [y/N]: N
    
    Local MySQL selected...
    
    Press Enter key to continue with latest version or Enter specific version such as: 1.9.4 , 2.0.1 , 2.0.2 ...etc
    
    Branch name set to v2.3.9
    
    Please choose to use default admin password 1234567, randomly generate one (recommended) or specify the admin password?
    Choose [d]fault, [r]andom or [s]et password: [d/r/s] 
    Admin password will be provided once installation is completed...
    
    
    Do you wish to install Memcached process and its PHP extension?
    Please select [Y/n]: Y
    
    Install Memcached process and its PHP extension set to Yes...
    
    
    Do you wish to install Redis process and its PHP extension?
    Please select [Y/n]: Y
    
    Install Redis process and its PHP extension set to Yes...
    
    
    Would you like to set up a WatchDog (beta) for Web service and Database service ?
    The watchdog script will be automatically started up after installation and server reboot
    If you want to kill the watchdog , run watchdog kill
    Please type Yes or no (with capital Y, default Yes): 
    Y
    26 ファイルが削除されました
    引数に一致する結果がありません: epel-release
    削除対象のパッケージはありません。
    依存関係が解決しました。
    行うべきことはありません。
    完了しました!
    ./cyberpanel.sh: 行 852
    
    (略)
    
    ###################################################################
                    CyberPanel Successfully Installed                  
                                                                       
                    Current Disk usage : 8/17GB (50%)                        
                                                                       
                    Current RAM  usage : 1208/9669MB (12.49%)                         
                                                                       
                    Installation time  : 0 hrs 22 min 0 sec                 
                                                                       
                    Visit: https://192.168.1.202:8090                     
                    Panel username: admin                              
                    Panel password: XTC8xF5UfyFjrsyu                        
                                                                       
                 Run cyberpanel help to get FAQ info
                 Run cyberpanel upgrade to upgrade it to latest version.
                 Run cyberpanel utility to access some handy tools .
                                                                       
                  Website : https://www.cyberpanel.net                 
                  Forums  : https://forums.cyberpanel.net              
                  Wikipage: https://docs.cyberpanel.net                
                  Docs    : https://cyberpanel.net/docs/               
                                                                       
                Enjoy your accelerated Internet by                  
                    CyberPanel & OpenLiteSpeed                                                   
    ###################################################################
    If your provider has a network-level firewall
    Please make sure you have opened following port for both in/out:
    TCP: 8090 for CyberPanel
    TCP: 80, TCP: 443 and UDP: 443 for webserver
    TCP: 21 and TCP: 40110-40210 for FTP
    TCP: 25, TCP: 587, TCP: 465, TCP: 110, TCP: 143 and TCP: 993 for mail service
    TCP: 53 and UDP: 53 for DNS service
    Would you like to restart your server now? [y/N]:N
    [root@cloudlinux ~]# reboot

    Cyberpanel確認

    https://192.168.1.202:8090

    初期設定

    CloudLinux設定

    アクティベーション

    [root@cloudlinux ~]# wget -q https://repo.cloudlinux.com/cloudlinux/sources/cln/cldeploy
    [root@cloudlinux ~]# bash cldeploy -k CLS-upQgiOyOQxnqNkmMhBlGTtoO
    Last available CloudLinux release: 9.5
    (略)
    Please reboot the server to apply the changes
    You can find complete log in /var/log/cldeploy.log
    [root@cloudlinux ~]# /sbin/reboot

    BootKey読み込み

    [root@cloudlinux ~]# wget -q https://repo.cloudlinux.com/cloudlinux/SECURE-BOOT-KEY-cloudlinux-kmod.der
    [root@cloudlinux ~]# mokutil --import SECURE-BOOT-KEY-cloudlinux-kmod.der
    input password: password
    input password again: password
    [root@cloudlinux ~]# /sbin/reboot

    PHP Selectorインストール

    [root@CloudLinux ~]# yum groupinstall alt-php -y

    Cagefsインストール

    [root@CloudLinux ~]# yum install cagefs -y
    [root@CloudLinux ~]# /usr/sbin/cagefsctl --init
    Mode: Disable All
    Creating symlink /usr/share/cagefs-skeleton/bin to usr/bin
    Copying /usr/bin/selectorctl to /usr/share/cagefs-skeleton/usr/bin/selectorctl
    (略)
    Copying /usr/share/ghostscript/lib/winmaps.ps to /usr/share/cagefs-skeleton/usr/share/ghostscript/lib/winmaps.ps
    Copying /usr/share/ghostscript/lib/zeroline.ps to /usr/share/cagefs-skeleton/usr/share/ghostscript/lib/zeroline.ps
    Updating users ...
    Updating statuses of users ...
    Error: CloudLinux Selector setup, path: /etc/php.ini 
    Error: CloudLinux Selector setup error for path: /usr/bin/php-cgi 
    Error: /usr/local/lsws/lsphp80/bin/php is mounted to CageFS. CloudLinux Selector will not be available. 
  • WordPressとLinuxの関係性とその重要性を徹底解説

    WordPressとLinuxの関係性とその重要性を徹底解説

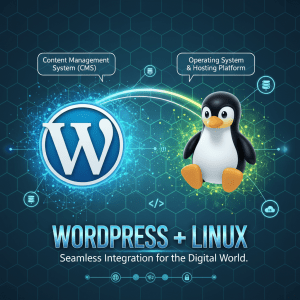
    WordPressは、世界中で広く利用されているコンテンツ管理システム(CMS)です。一方、Linuxはサーバー環境で主に使用されるオープンソースのオペレーティングシステムとして知られています。この2つのツールは、ウェブサイトの運用や管理において相互に密接な関係を持っています。本記事では、WordPressとLinuxの基本的な関係性について解説し、それがなぜ重要なのかを深掘りします。


    WordPressとLinuxの基本的な関係性を理解しよう

    WordPressはPHPというプログラミング言語で構築され、MySQLというデータベースを利用します。Linuxは、これらの技術をサポートする環境を提供する最も一般的なオペレーティングシステムです。多くのWebサーバー、特にApacheやNginxといったソフトウェアはLinux上で動作するように設計されており、これらはWordPressを快適に運用するための基盤を形成します。

    Linuxはオープンソースであるため、カスタマイズ性が高いという特長があります。この特性により、WordPressユーザーや開発者は、自身のプロジェクトに最適なサーバー環境を構築できます。たとえば、動作速度やセキュリティを向上させるために必要な設定を自由に調整することが可能です。また、Linuxはリソース消費が少ないため、低コストで効率的な運用が実現できます。

    さらに、多くのWebホスティングプロバイダーがLinuxベースの環境を標準として提供しており、これによりWordPressユーザーは手軽にウェブサイトを立ち上げることができます。LinuxはWordPressとの高い互換性と安定性を誇り、結果的に多くのウェブサイト運営者にとって最適な選択肢となっています。


    LinuxがWordPress運用において重要な理由とは

    第一に、セキュリティの観点からLinuxは非常に優れています。オープンソースであるため、世界中の開発者がセキュリティの脆弱性を迅速に発見し対応することが可能です。WordPressは利用者が多いため、攻撃のターゲットになりやすいですが、Linuxを使用することでサーバーレベルでの防御を強化でき、これがウェブサイト全体の安全性向上につながります。

    第二に、Linuxはスケーラビリティの高い環境を提供します。WordPressサイトが成長し、トラフィックが増加した場合でも、Linux上で適切なリソース管理を行うことで、サーバーのパフォーマンスを維持することが可能です。また、Linuxはクラウドサービスとの親和性が高く、AWSやGoogle Cloudのようなクラウドインフラを活用する際にも最適です。

    第三に、コスト効率の良さもLinuxが選ばれる理由の一つです。Linuxは無料で利用できるオペレーティングシステムであり、ライセンス料が必要ありません。そのため、小規模なプロジェクトから大規模なウェブサイト運営まで、幅広いケースでコストを抑えながら利用できます。これらの理由から、LinuxはWordPress運用において非常に重要な存在だと言えます。


    WordPressとLinuxの関係性は、単なる技術的な互換性を超えて、多くの利点をもたらすものです。LinuxはWordPressにとって信頼性、効率性、およびセキュリティの面で理想的な基盤を提供しています。そのため、WordPressの運用を成功させるためには、Linuxの特徴と恩恵を活かすことが重要です。今後も、WordPressとLinuxの組み合わせがウェブサイト運用において主要な選択肢であることに変わりはないでしょう。